How to Turn Any Photo Into a 3D Model — Single Image and Multi-Image Guide
Arcframe lets you generate production-ready 3D models (GLB format) from a single photo or up to four reference images. No 3D modelling skills required. Here's the complete step-by-step guide.
AI 3D Generation: What's Actually Possible Now
Until recently, creating a 3D model of a real object meant hiring a 3D artist or spending hours learning Blender. AI changed that. Arcframe uses state-of-the-art models from Microsoft (Trellis), Tencent (Hunyuan 3D), and Meshy to generate fully textured 3D mesh files directly from photographs — in under two minutes.
The output is a GLB file, the industry-standard format for 3D content. GLB files work in Unity, Unreal Engine, Blender, Three.js, and any major 3D tool. You can view them interactively directly on Arcframe before you download.
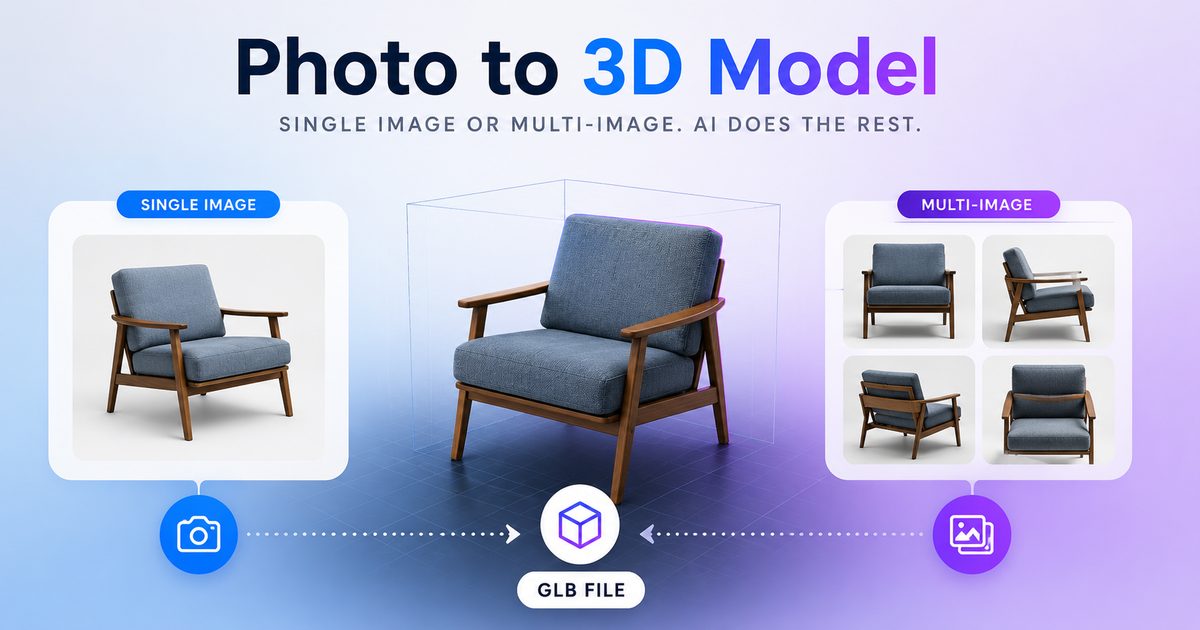
Two Methods: Single Image vs Multiple Images
Arcframe offers two image-to-3D modes, and the choice depends on how much reference material you have:
- Image to 3D (single image) — fastest option; best for objects with a clear, unambiguous shape from one angle.
- Multi-Image to 3D (2–4 images) — slower but significantly more accurate; the model reconstructs geometry from multiple viewpoints, producing better topology and fewer artefacts on complex objects.
Method 1: Single Image to 3D
When to use it
Single-image 3D works best for symmetrical or visually simple objects: a product on a white background, a character facing the camera, a piece of furniture shot from its primary angle, a vehicle side profile, or a food item for a menu visual.
Step by step
- Open the Arcframe dashboard and select the 3D output tab.
- Select Image to 3D from the mode pills.
- Click the upload zone and select your photo. The image is stored securely in your Arcframe asset library. Best results come from: clean background (white or neutral), good even lighting, and the subject filling most of the frame.
- Optionally add a text prompt to guide the model (e.g. "smooth ceramic finish", "weathered leather texture"). The prompt is optional — the model works from the image alone.
- Choose your model:
- Trellis (Microsoft) — excellent detail and texture fidelity on product-style objects. 12 credits.
- Hunyuan 3D Image (Tencent) — strong on organic shapes and characters. 12 credits.
- Click Generate. The job runs in the background — typical render time is 60 to 90 seconds.
- When complete, the 3D viewer loads directly in your dashboard. Rotate, zoom, and inspect the model before downloading.
- Click Download GLB to save the file.
Method 2: Multi-Image to 3D (2–4 Photos)
When to use it
Multi-image 3D is ideal when you need accurate geometry: a product that will be used in an e-commerce AR preview, a character that will be animated, or any object with significant depth, complex edges, or features that are invisible from a single viewpoint (the back of a shoe, the underside of a gadget, the inside of a handle).
Tips for photographing your subject
- Shoot from front, back, left side, and right side — or front, 45° left, 45° right, and top-down for compact objects.
- Keep the camera distance consistent across all shots.
- Use consistent lighting — avoid dramatic shadows that differ between shots, as they confuse the reconstruction.
- Plain or neutral backgrounds help the model isolate the subject.
- 2 images work for simple objects; 3–4 images significantly improve complex shapes.
Step by step
- Open the Arcframe dashboard and select the 3D output tab.
- Select Multi-Image to 3D from the mode pills.
- The multi-image uploader shows numbered image slots. Click each slot and upload your photos. You can upload 2, 3, or 4 images. Each slot shows a thumbnail with a numbered badge; remove and replace any slot individually.
- Add an optional text prompt if you want to influence texture style.
- The only available model is Meshy v6 Multi — currently the best multi-image-to-3D model available, with excellent mesh quality and PBR textures. 20 credits per generation.
- Click Generate. Multi-image jobs typically take 2–4 minutes.
- Review in the interactive 3D viewer, then download your GLB.
What to Do With Your 3D Model
- E-commerce AR: embed the GLB on your product page so customers can view it in their space via WebAR.
- Game and app assets: import directly into Unity or Unreal Engine.
- Marketing visuals: render the model in Blender with custom lighting for high-end product photography without a studio.
- Print: send to a 3D printer for a physical prototype.
- Social media: export a turntable video of the rotating model for Instagram or product reels.
Start Generating 3D Models
3D generation is available on Arcframe Starter, Pro, and Studio plans. Visit arcframe.ai to get started — free accounts include starter credits to try the platform.